
This strawberry icebox cake is the ultimate no-bake summer dessert layered with fresh strawberries, malted whipped cream, and vanilla wafers for a nostalgic treat that’s cool, creamy, and as easy as layering ingredients in a loaf pan.
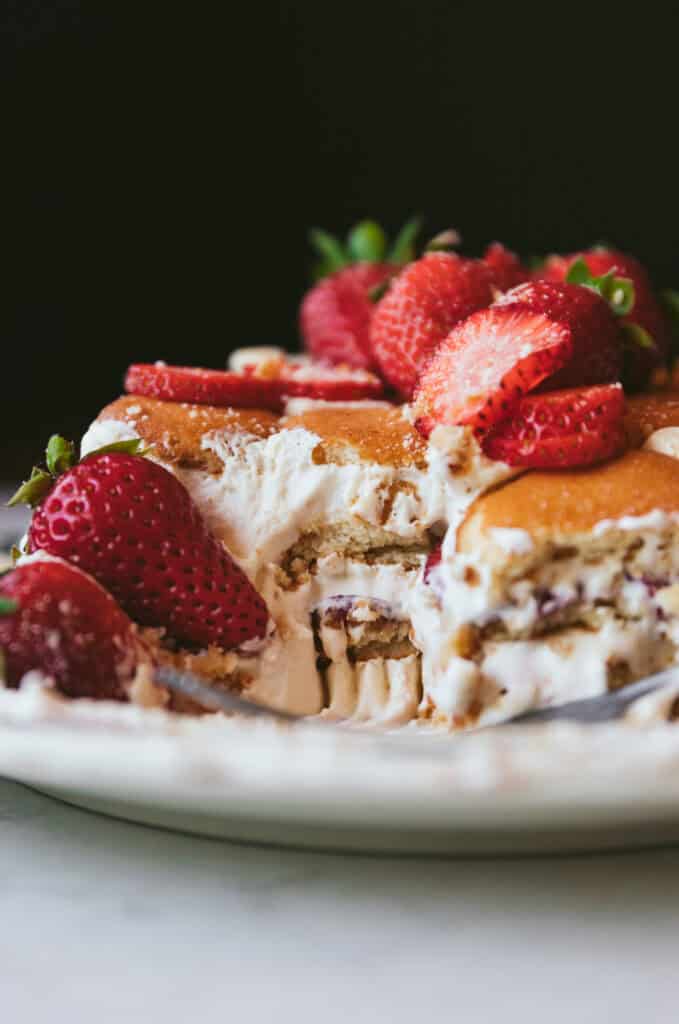
We’ve officially entered that season where I start side-eyeing the oven like, Do I really need you to be on right now? The answer, thankfully, is no—not when there’s icebox cake. These no-bake beauties aren’t heavy in my usual baking rotation, but when the timing is right (read: it’s hot and I still want dessert), they come in clutch. See: No-Bake Tres Leches Cake (an old fave!) Strawberries are showing off right now—these pictured here are peak-season Oregon berries from where our friend Karlee lives, and they are absolute stunners. I first made this cake with banana slices (which I absolutely do not regret and fully recommend if strawberries are out of reach), but the berries take it somewhere magical—halfway between shortcake and a malted milkshake. Let’s get into it!
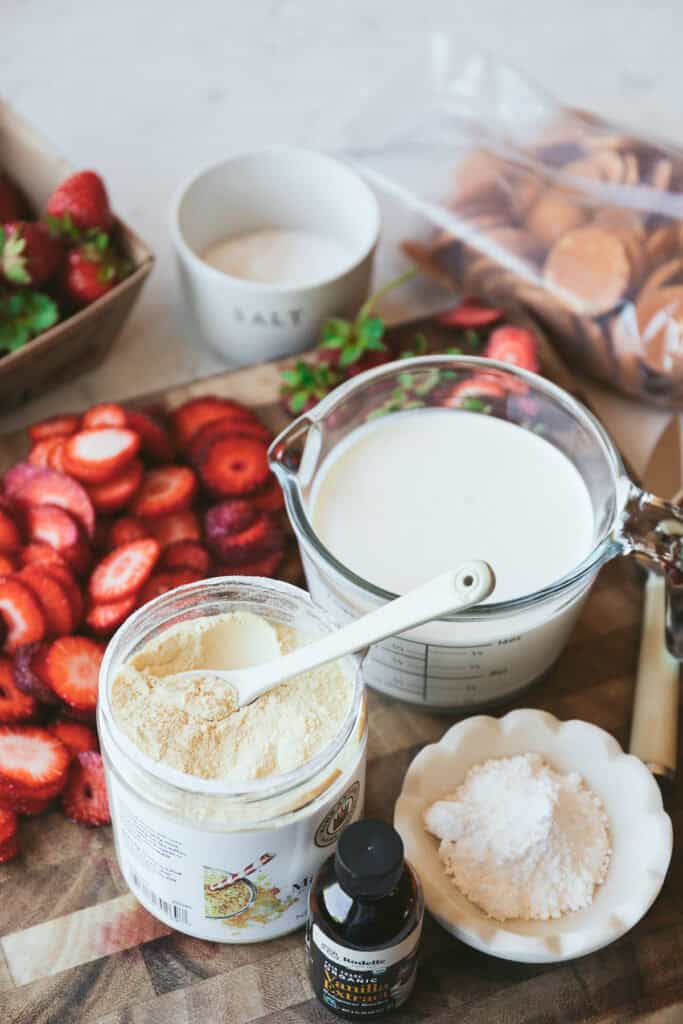
Here’s what you’ll need for this cool and creamy Strawberry Icebox Cake with malted whipped cream:
• Vanilla wafers soften into cake-like layers once chilled with whipped cream, they’re the no-bake foundation that holds this beauty together.
• Malted milk powder helps add that vintage soda fountain flavor and makes this cake taste like strawberry shortcake met a frosty milkshake.
• Powdered sugar – Just enough to sweeten the whipped cream without overpowering the strawberries.
• Fine sea salt – A tiny pinch wakes everything up and balances the sweetness.
• Heavy cream is whipped into soft, dreamy peaks. It’s the rich, fluffy base that makes this dessert a sliceable cloud.
• Vanilla extract – Adds warmth and depth to the whipped cream. Never skip it.
Fresh strawberries – Juicy, bright, and sliced just thick enough to hold their own between layers. Save a few for the top, too!
Start by lining a 9×5-inch loaf pan with plenty of plastic wrap – like, more than you think. You want enough overhang on all sides so you can wrap the whole thing up snug later. Press a layer of vanilla wafers into the bottom of the pan, rounded side down. This will be the top of your cake once it’s flipped, so think flat and tidy.
Next, it’s time to make the whipped cream situation sing. In a medium bowl, whisk together the malted milk powder, powdered sugar, and just a pinch of salt. Add a little splash of the cream and whisk it smooth to keep any lumps at bay. Then, slowly whisk in the rest of the cream along with the vanilla extract. Keep whisking – vigorously if you’re up for it, or grab your electric hand mixer for backup and beat until soft but very sturdy peaks form.
Pro Tip: The stiffer your whipped cream, the sturdier and more sliceable your finished cake will be—think picture-perfect loaf slices. If you stop at looser peaks (like what’s pictured here), the result will be more of a soft, pudding-like scoop situation. Equally delicious – just a matter of preference.